

 Français
 The flowering stage for autoflowers typically lasts between 8 to 12 weeks, meaning that you can get a crop in a matter of months instead of waiting for the season to change. This short life cycle also means that you don't have to rely on light schedules, making them easier to grow than other varieties. Autoflowering cannabis is an excellent option for those looking for quick harvests and minimal effort.
Autoflowering cannabis is the perfect choice for busy growers who want to enjoy the fruits of their labor sooner rather than later. Experience all the benefits of a harvest in a much shorter life cycle and get ready for even more amazing results with the next section on The life cycle of autoflower varieties!
The Life Cycle of Autoflower Varieties
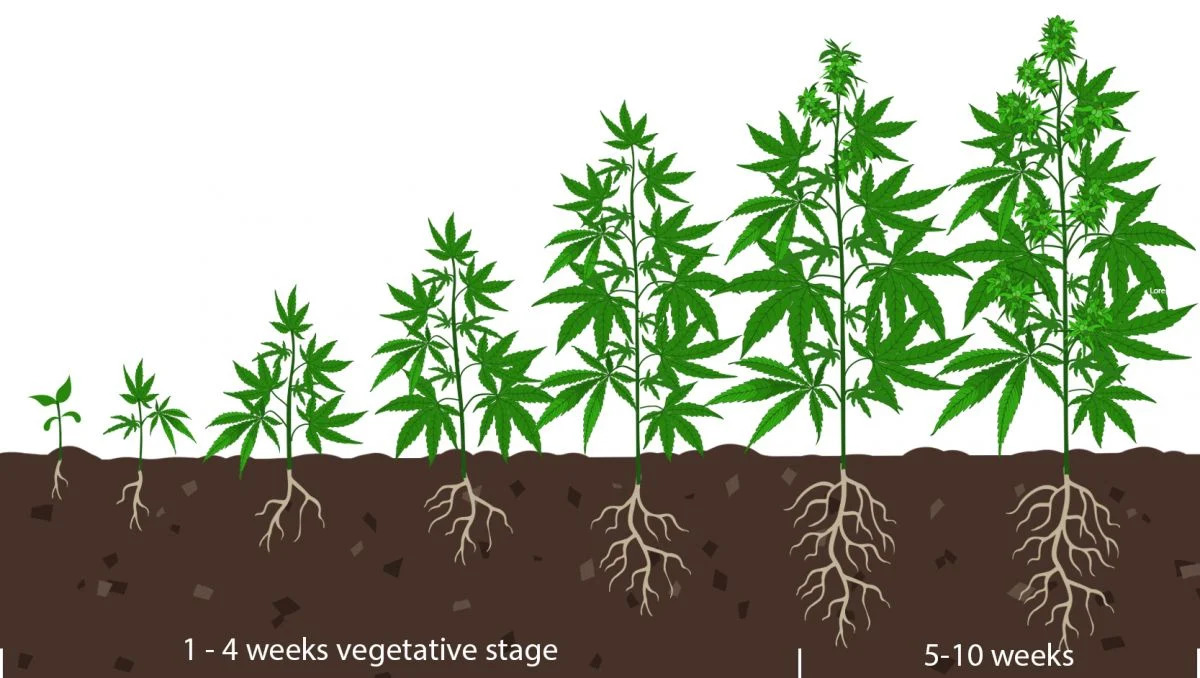
Autoflower varieties of cannabis are a unique type of plant, with a significantly shorter life cycle than traditional varieties. They go through three distinct stages – germination phase, vegetative growth, and flowering.
The germination process is the initial stage of the autoflower lifecycle, where the seed sprouts and begins to grow its first set of leaves. This stage typically lasts for 1-2 weeks. After that, the plant moves into the vegetative phase, where it will spend anywhere from 2-6 weeks growing in size and producing fan leaves.
The final stage of the autoflower lifecycle is flowering, which usually takes 4-8 weeks depending on the strain. During this time, autoflower buds will start to form and mature until they’re ready to be harvested.
The entire life cycle of an autoflower typically takes 8-16 weeks from seedling to harvest – much shorter than other autoflowering varieties which can take up to 6 months or longer! Autoflowers are also easier to grow since they don’t require to grow-light schedules like regular strains do.
For these reasons, autoflowers are an excellent choice for both novice and experienced growers alike who want quick harvests without too much hassle.
Read More: Can You Clone Autoflower
Autoflower week 1: Germination / Seedling
The first week of autoflowering cannabis is an exciting time for any gardener. During this period, the seed will begin to germinate and sprout its first set of leaves. This process usually takes 1-2 weeks, depending on your setup and varietal.
To ensure your autoflower seeds are healthy, many cannabis growers opt to germinate them outside of the soil by placing them on a wet paper towel inside a plastic container. Make sure to keep the container in a warm, dry place and spray with warm water every few hours.
Once the seed has germinated, it will move into the vegetative phase where it will spend anywhere from 2-6 weeks growing in size and producing fan leaves. During this period, you'll need to provide your marijuana plant with an adequate amount of light and nutrients if you want it to reach its full potential.
Autoflower week 2: Seedling
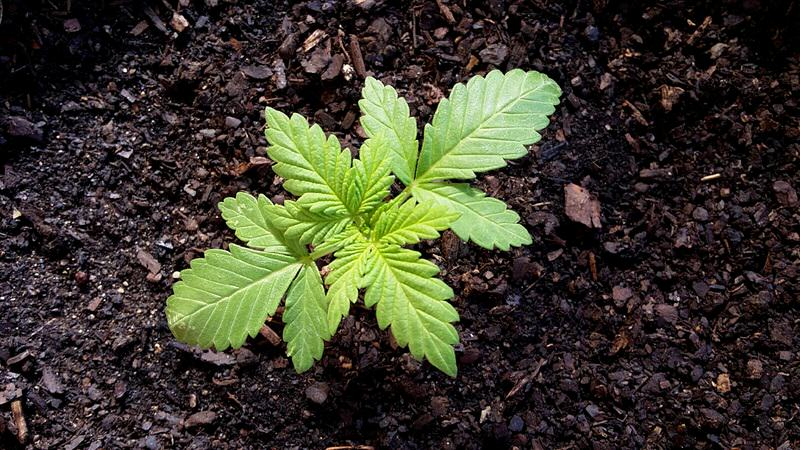
Autoflower week 2 is the late seedling stage, where you'll begin to see your plants form their first set of true leaves. At this stage, the leaves will start to spread out vertically to absorb more light. To ensure a healthy growth stage during the vegetative phase, you should begin supplementing your autoflower with quality soil nutrients such as organic booster tablets and fertilizers. Don't forget – autoflowers don't need as much feeding as regular varietals so don't go overboard!
Autoflower week 3: Vegetation
Autoflower week 3 marks the start of the vegetation stage for your autoflower. At this point, you'll begin to see more robust growth, with your indoor plant growing quickly and reaching heights of anywhere between 30-60 cm. As far as light and nutrient needs go, keep up with the same regimen as before – 18+ hours of bright light per day and regular feeding.
Humidity levels should remain around 50% relative humidity, while temperatures should stay at a comfortable 20 °C. You can also introduce a fan during this stage if you want to increase air circulation, which will help reduce heat stress on your plants. If done correctly, your autoflower should be well on its way toward reaching maturity by the end of this week!
Autoflower week 4: Vegetation
Autoflower week 4 marks the end of the vegetation stage, and as such, your autoflower is almost ready for flowering. During this week, you can expect to see some pre-flowering signs such as small white hairs appearing on the nodes of your weed plant. Your autoflower is still growing at this stage though, so it's important to keep up with regular feeding and lighting requirements.
If you have been training your plant over the past few weeks, now is a good time to stop as stressing out your plant could interfere with its flowering period. Keep humidity levels around 50% relative humidity and temperatures at a comfortable 20 °C.
Read More: When to Top Autoflower
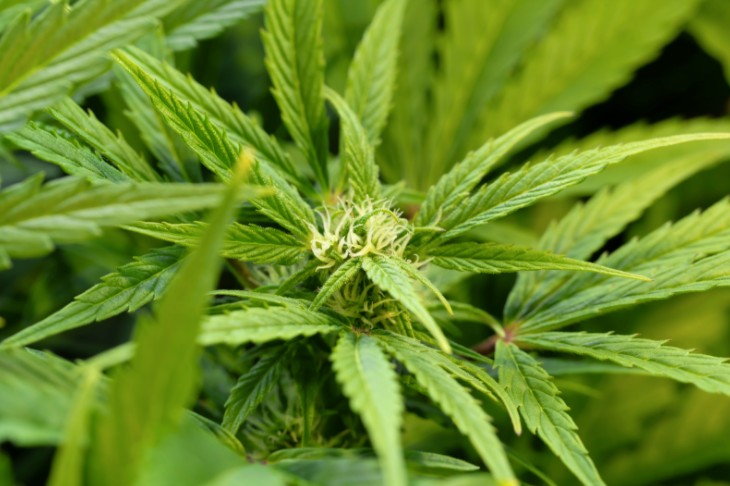
Autoflower week 5: Pre-flowering

At week 5, your autoflowers are ready to start flowering! You will likely notice the pre-flowering signs of pistils forming on female plants and pollen sacs appearing on male plants. If you're not looking to seed your autoflowers, make sure to remove your male plants at the first sign of sac growth.
In terms of setup, continue to keep humidity levels at around 50% relative humidity and temperatures around 20 °C. Additionally, make sure that your light source is no closer than 70 cm away from your canopy to avoid any heat stress. By the end of this week, you should be well on your way towards a beautiful harvest!
Autoflower week 6: Flowering
The flowering stage of autoflowers is a crucial part of the growing process and it's important to get it right. During this stage, your plants will be making the transition from vegetative growth to flowering. You will need to adjust your lighting and fertilizers accordingly. Make sure to switch your lighting source to a warm red spectrum and use a fertilizer that is tailored for flowering stages.
Additionally, autoflower plants require twice the amount of water during the flowering phase than during the vegetative stage, so ensure that you are feeding 1 liter every 24 hours. With these steps in place, you should be well on your way towards a healthy and successful harvest!
Read More: Cannabis Landrace
Autoflower week 7: Flowering
The flowering stage of autoflowering plants is in full swing at week 7. Your plant should be pushing 30 cm, and you should adjust your lighting to about 45 cm above the canopy. The humidity should also be dropped to 40%, and you should water daily with 1.5 liters of water each day. Additionally, feeding should increase according to your fertilizer's instructions.
You should also inspect your plants for any abnormalities on the buds like protrusions or abscesses, as this can indicate hermaphrodite plants beginning to pollinate themselves during this stage. With these steps in place, you can look forward to a healthy and successful harvest!
Autoflower week 8: Flowering
The flowering stage is reaching its climax at week 8. Your plants should be around 40 cm tall and the buds should be growing rapidly. At this point, it's best to keep your lighting around 35 cm to prevent burning and keep the humidity level at 40%.
Watering 1.5 liters a day should also continue, and you can increase your nutrient intake to maximize the bud growth cycle. Make sure to inspect your plants for any signs of hermaphrodites, as these may begin pollinating themselves during this stage. With proper care, you can look forward to a successful harvest!
Autoflower week 9: Flowering
At week 9, your autoflower plants should almost be ready for harvest. Buds should be big and dense and the plant should have a strong smell. It's important to keep up with your watering and nutrient intake to ensure healthy and faster growth during this stage.
Additionally, you should continue controlling light intensity, air temperature, and humidity at 24 °C and 40% respectively. Inspect for any signs of mold or pests that could hamper the health of the plants. Depending on your strain, you can either continue with your flowering regimen or skip forward to the pre-harvest stage.
Autoflower week 10: Flowering
By now, your autoflower plants should be in their final stages of flowering and ready for harvest shortly. Buds should be very dense and the plant should be heavy with resin. You'll want to keep up with your watering and nutrient intake, as well as controlling light intensity, air temperature, and humidity at 24 °C and 40% respectively.
Inspect for any signs of mold or pests that could harm the health of the autoflowering cannabis plants. Don't forget to flush out your soil with water to improve the taste of your buds! Depending on your strain, you may only have a few days left before harvest time or it could take up to 12 weeks for full maturity. Keep an eye on your autoflowers and get ready for harvest!
Autoflower week 11: Flushing / Defoliate
At this stage, it's time to flush out the nutrients from the soil and begin to defoliate your autoflowers. Flushing is essential to ensure that any excess minerals are removed before harvest. To do this, feed your cannabis plants plain water for at least two weeks. This will help remove any built-up salts and minerals in the medium, resulting in a better-tasting product once harvested.
Defoliation is the process of removing some of the fan leaves from the lower growth of your autoflowers. This can help light penetrate more evenly through the plant and aid in ripening those top colas faster. The biggest factor when it comes to defoliation is timing.
You want to make sure you don't take off too much too soon, as it can slow down the ripening process. Remove no more than 10-15% of each plant and carefully inspect each bud before harvesting!
Read More: Hydroponic vs. Soil Cannabis Cultivation
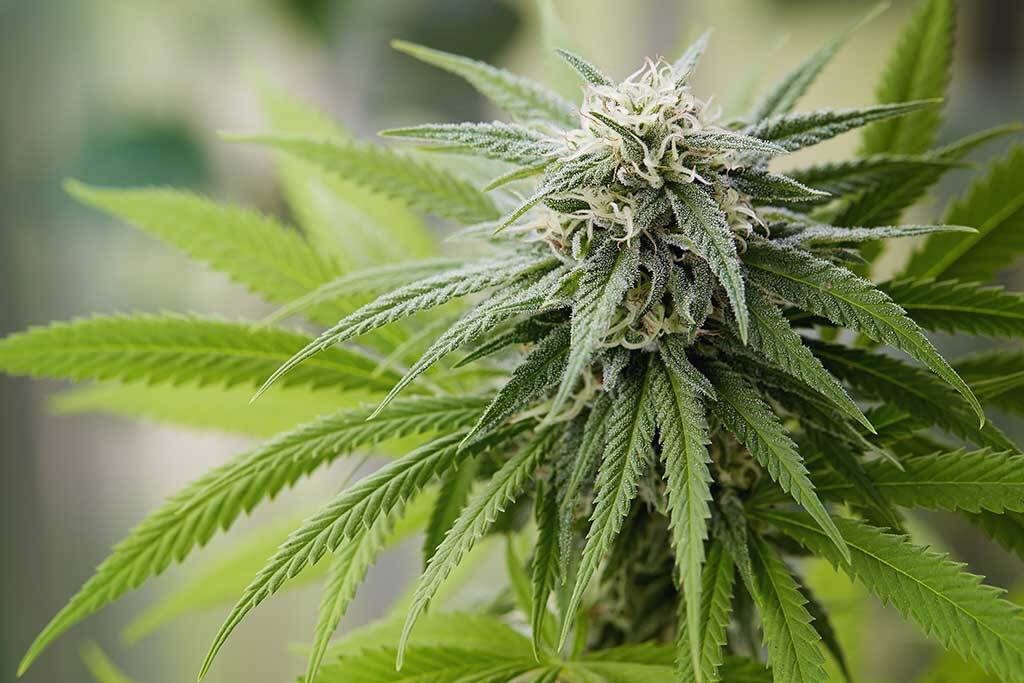
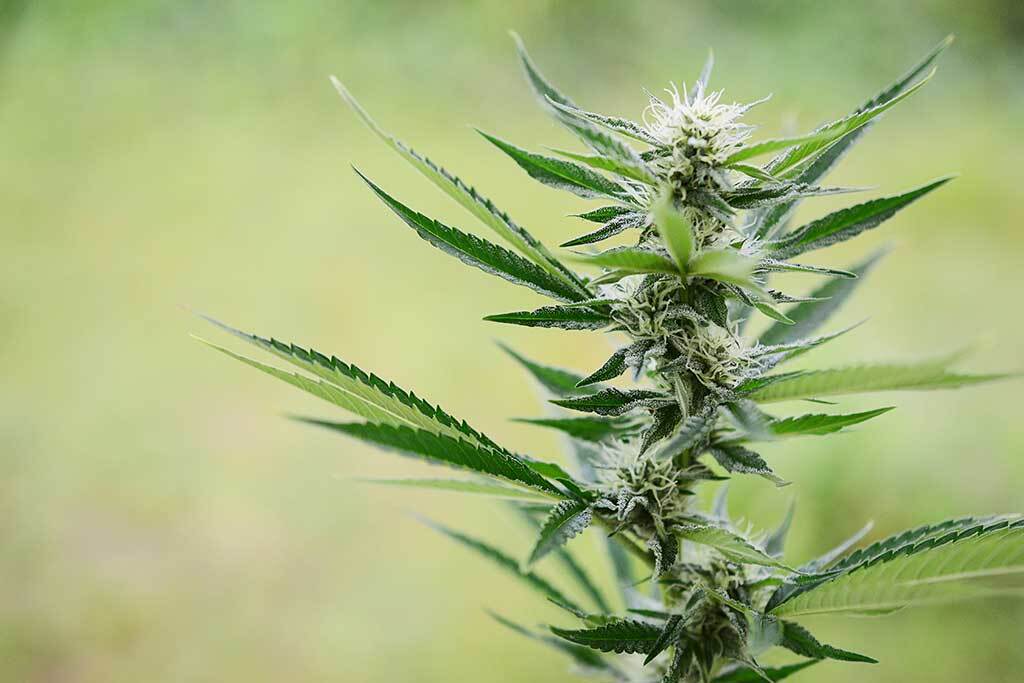
Week 12: Harvest
Week 12 marks the end of your autoflower's flowering stage and is time to harvest. Before cutting down your cannabis plants, you should make sure that they are in peak condition by checking the trichomes and pistils.
If the trichomes have changed color from clear to an amber hue, it means that most of the THC has been converted into CBD, providing a more calming effect. The pistils should also be brownish-orange in color, indicating that autoflowers are ready for harvest.
Once everything looks good, it's time to cut down your plants and hang them upside down for drying. This process can take anywhere from 5 to 14 days depending on humidity levels and temperature in the room.
During this period, it is important to check up on your buds regularly, when they feel dry enough (but not too dry) you can begin trimming off any excess foliage before curing them in airtight jars or containers. Congratulations! You have successfully harvested your autoflower crop!
Read More: How To Dry Buds Without Hanging
Grow Your Autoflower
In conclusion, the flowering stage for autoflowers can vary depending on the specific autoflowering seeds, growing conditions, and cannabis genetics. Generally, autoflowers enter the flowering stage between two and four weeks after germination and can last for six to ten weeks. Proper care and attention during this stage, including providing the appropriate nutrients and light cycles, can help ensure a successful harvest of high-quality buds.